转载请注明原帖链接和作者!
路由器平台一般都使用 OpenWrt 这个 Linux 发行版。但是对于 MT7621 这样的性能稍微较高的 CPU 而言,跑 OpenWrt 感觉有些浪费,毕竟 OpenWrt 是精简系统,不仅缺少各种常用软件包,已有软件包也是各种精简,缺少功能。不仅如此,OpenWrt 的整个系统架构也十分精简,缺少扩展性。因此我打算换用一个常见的 Linux 发行版。
说到常见的 Linux 发行版,最容易想到的就是 Debian 了。Debian 官方提供 MIPS 平台的成品 image。虽然相对于 Debian,我更倾向于使用其衍生版 Ubuntu。但是 Ubuntu 又没有提供 MIPS 平台的 image,因此也就只能用 Debian 凑合着用了。
我打算将 Debian 安装在 SD 卡上。
测试平台依然是 CreativeBox v1,因为它实在是太好用了。除了SD卡槽,还有3个USB接口(其中一个是eSATA),刚好能满足我插3个USB设备的需求。
1. 制作 bootstrap 版 OpenWrt
为了能够正常创建 Debian rootfs,我需要首先编译一版支持 SD 卡和 ext4 文件系统,且带有必要软件的固件。
1.1 选择必需的 OpenWrt 软件包和配置
这里只选择制作 Debian rootfs 所需的软件包和必要的配置(但是 Kernel build options 在后面也是必要的):
Global build settings —> Kernel build options —> Compile the kernel with MIPS FPU Emulator
Advanced configuration options (for developers) —> Toolchain Options —> C Library implementation —> Use glibc (可选,如果需要把 OpenWrt 里面的程序复制到 Debian 里面直接使用)
Base system —> block-mount
Base system —> ca-bundle
Network —> File Transfer —> wget
Kernel modules —> Cryptographic API modules —> kmod-crypto-crc32c
Kernel modules —> Filesystems —> kmod-fs-ext4
Kernel modules —> Native Language Support —> kmod-nls-utf8
Kernel modules —> Other modules —> kmod-sdhci-mt7620
Utilities —> Disc —> fdisk
Utilities —> Filesystem —> e2fsprogs
Utilities —> Compression —> xz-utils (要先选择它,否则 debootstrap 不会显示)
Administration —> debootstrap
1.2 编译 OpenWrt,并将固件写入路由器
过程略
2. 制作 Debian rootfs
2.1 准备 SD 卡
在电脑上对 SD 卡进行分区(按需分区),如果有条件(例如使用 Linux 系统,或者拥有分区工具)可以将分区直接格式化成 ext4。
2.2 在 OpenWrt 里对 SD 卡进行分区并格式化 (可选,如果已在 2.1 里完成,则略过)
在 OpenWrt 里使用 fdisk 对 SD 卡进行分区:
root@OpenWrt:/# fdisk /dev/mmcblk0

Welcome to fdisk (util-linux 2.33).
Changes will remain in memory only, until you decide to write them.
Be careful before using the write command.


Command (m for help):
输入 g,并回车,创建一个空白的 GPT 分区表。注意此操作会清除 SD 卡内原先的数据。
Command (m for help): g

Created a new GPT disklabel (GUID: 67DBD280-0924-2C4B-8EF5-0A0C67127A8A).
The old dos signature will be removed by a write command.
输入 n,并回车,创建一个新的分区。一路回车即可,完成后会将整个 SD 卡的空间创建为一个分区。
Command (m for help): n
Partition number (1-128, default 1):
First sector (2048-61741022, default 2048):
Last sector, +/-sectors or +/-size{K,M,G,T,P} (2048-61741022, default 61741022):

Created a new partition 1 of type 'Linux filesystem' and of size 29.4 GiB.
按 w,并回车,保存改动,并退出。
Command (m for help): w
The partition table has been altered.
Calling ioctl() to re-read partition table.
[  883.453161]  mmcblk0: p1
Syncing disks.
格式化分区为 ext4,并记住此分区的文件系统 UUID,后面可能会用到:
root@OpenWrt:/# mkfs.ext4 /dev/mmcblk0p1
mke2fs 1.44.3 (10-July-2018)
Creating filesystem with 7717371 4k blocks and 1929536 inodes
Filesystem UUID: 712a387d-deca-47b1-bfbe-95696455edbd
Superblock backups stored on blocks:
	32768, 98304, 163840, 229376, 294912, 819200, 884736, 1605632, 2654208,
	4096000

Allocating group tables: done
Writing inode tables: done
Creating journal (32768 blocks): done
Writing superblocks and filesystem accounting information: done
2.3 制作 Debian 系统
首先确保路由器能连接到互联网。
然后挂载 SD 卡分区:
root@OpenWrt:/# mkdir /mnt/debian_root
root@OpenWrt:/# mount /dev/mmcblk0p1 /mnt/debian_root/
[  742.386023] EXT4-fs (mmcblk0p1): mounted filesystem with ordered data mode. Opts: (null)
在执行 debootstrap 之前,要修改其中的一个文件,否则后续的操作会失败:
修改 /usr/share/debootstrap/functions:
搜索 in_target mount -t sysfs sysfs /sys,将 mount 改成 /bin/mount
然后执行 debootstrap 开始制作 Debian rootfs:
root@OpenWrt:/# debootstrap --arch mipsel --include=perl,vim buster /mnt/debian_root http://ftp.cn.debian.org/debian/
https://www.debian.org/mirror/list 里面有所有的软件源镜像地址,按需选择最快的那个。中国的两个源有两个:
http://ftp.cn.debian.org/debian/ 重定向到 http://mirrors.ustc.edu.cn/debian/
http://ftp2.cn.debian.org/debian/ 重定向到 https://mirrors.tuna.tsinghua.edu.cn/debian/
接下来就是漫长的等待。。。
debootstrap 执行完毕后,还需要进行后续操作,使得 rootfs 可以被启动:
2.3.1 chroot 进入 Debian rootfs:
root@OpenWrt:/# LANG=C.UTF-8 chroot /mnt/debian_root /bin/bash
如果 Debian 是正确安装的,那么进入 Debian 后,主机名依然会是 OpenWrt。
2.3.2 创建初始设备节点 (可选,如果要在挂载 /dev 前调试 init):
root@OpenWrt:/# mknod /dev/console c 5 1
root@OpenWrt:/# mknod /dev/ttyS0 c 4 64
2.3.3 设置 root 密码:
root@OpenWrt:~# passwd
New password:
Retype new password:
passwd: password updated successfully
2.3.4 设置主机名:
root@OpenWrt:~# echo localhost > /etc/hostname
localhost 可改为自己想要的名字。
2.3.5 安装一些常用的软件
这个按需选择即可:
root@OpenWrt:~# apt install XXXX
3. 编译用于启动 Debian 系统的 Linux Kernel
到目前为止,Linux Kernel 都是用于启动 OpenWrt 的。需要进行修改,才能用于直接启动 Debian。
通过 debootstrap 创建的 Debian 系统,是没有 initramfs 的,因此必须将挂载 rootfs 所需的所有内核模块全部编译进 kernel。
3.1 Linux kernel 中需要修改的项目
Device Drivers —> MMC/SD/SDIO card support —> MMC block device driver
Device Drivers —> MMC/SD/SDIO card support —> MTK SD/MMC (如果以后 MT762x 支持被添加到 mtk-sd.c 里面了,那么选择 MediaTek SD/MMC Card Interface support)
File systems —> The Extended 4 (ext4) filesystem
File systems —> Kernel automounter version 4 support (also supports v3)
File systems —> Native language support —> Default NLS Option —> utf8
File systems —> Native language support —> NLS UTF-8
另外,可以选上 USB 相关的:
Device Drivers —> SCSI device support —> SCSI device support
Device Drivers —> SCSI device support —> SCSI disk support
Device Drivers —> SCSI device support —> SCSI generic support
Device Drivers —> USB support —> Support for Host-side USB
Device Drivers —> USB support —> xHCI HCD (USB 3.0) support
Device Drivers —> USB support —> Generic xHCI driver for a platform device
Device Drivers —> USB support —> xHCI support for Mediatek MT65xx/MT7621
Device Drivers —> USB support —> USB Mass Storage support
Device Drivers —> USB support —> USB Attached SCSI
可以选上 SATA 相关的:
Device Drivers —> Serial ATA and Parallel ATA drivers (libata) —> AHCI SATA support
去掉内置的 Kernel command line:
Kernel hacking —> 取消选择 Built-in kernel command line
3.2 OpenWrt 中需要修改的项目
去掉选择 OpenWrt 里面对应 3.1 中的 kmod package:
kmod-crypto-crc32c
kmod-fs-ext4
kmod-fs-autofs4
kmod-sdhci-mt7620
kmod-mmc
kmod-nls-utf8
SATA 相关的:
kmod-ata-core
USB 相关的:
kmod-scsi-core
kmod-scsi-generic
Kernel modules —> USB Support 里面的全部取消
USB 相关的全部取消之后,即可取消 kmod-nls-base
选择 Debian 系统必需的:
Global build settings —> Kernel build options —> Compile the kernel with device tmpfs enabled
Global build settings —> Kernel build options —> Enable kernel cgroups
Global build settings —> Kernel build options —> Enable kernel namespaces
修改 OpenWrt 的 dts 文件:
target/linux/ramips/dts 里找到路由器对应的 dts 文件,修改其中的 bootargs =,增加如下内容:
root=/dev/mmcblk0p1 rw rootwait
3.3 删除一些无用的 patch
OpenWrt 里面一些用具精简 Kernel 的 patch 对于 Debian 来说意义不大了,因此可以删掉:
/home/hackpascal/openwrt/openwrt-dev/target/linux/generic/pending-x.x:
305-mips_module_reloc.patch
307-mips_highmem_offset.patch
3.4 重新编译 Linux kernel
至此修改完成,可以编译了。这次只需要 Kenrel 本身,不需要 rootfs,因此执行以下命令进行编译:
make target/linux/install V=s
编译完成后,在以下目录:
build_dir/target-mipsel_24kc_glibc/linux-ramips_mt7621
可以得到成品 Kernel 的 uImage 文件 *-kernel.bin
4. 启动 Debian 系统
将 Kernel uImage 按照固件的方式进行更新,然后启动。
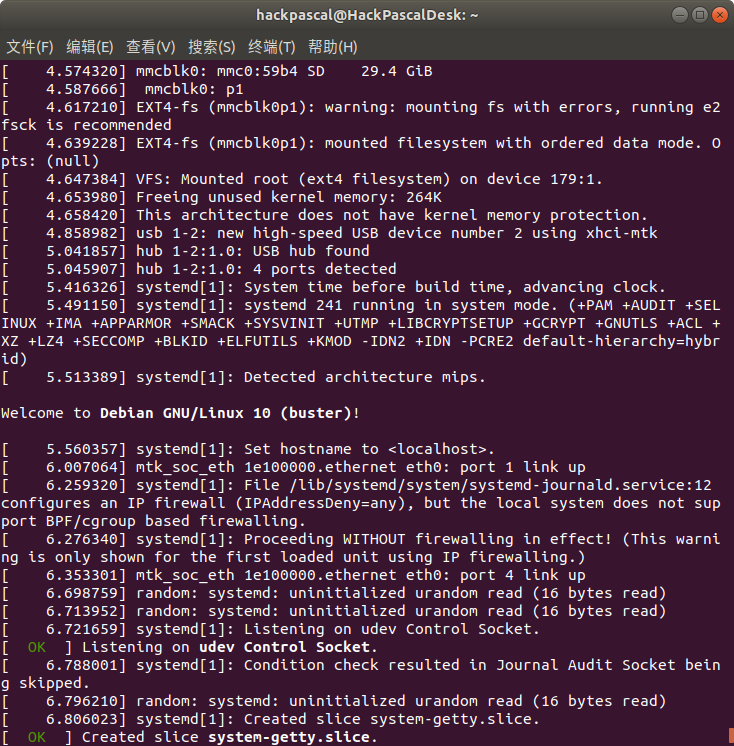
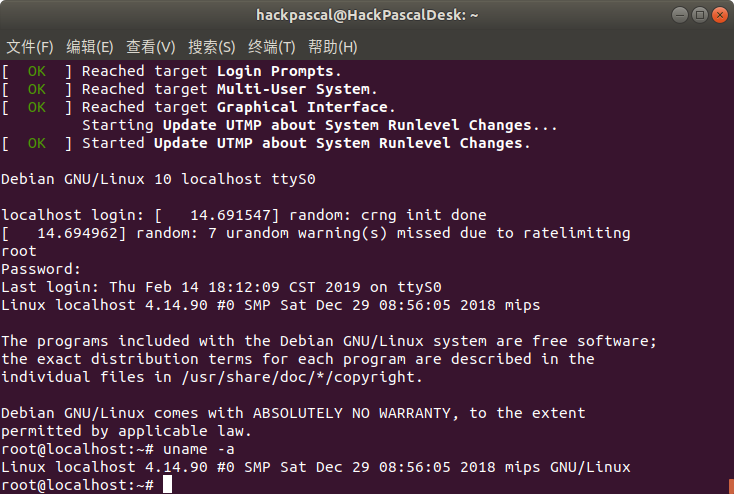
5. 后记
至此,一个基础的 Debian 系统便制作完成。
其中为了解决 /sbin/init 无输出的问题,我编写了 init 脚本用于调试,才知道是 /dev 下面没有 console 和 ttyS0 设备文件。
之后便能看到 /sbin/init 的输出了,各种 error。。。。
然后各种 Google,开启 OpenWrt/Kernel 的各种选项,才最终让系统跑起来。
参考
[1] https://www.debian.org/releases/stable/mipsel/apds03.en.html
哈哈哈不错, 下一步打算做成啥? DebianWrt?
不做成路由
忽然之间就更新了
一直都是薛定谔的更新